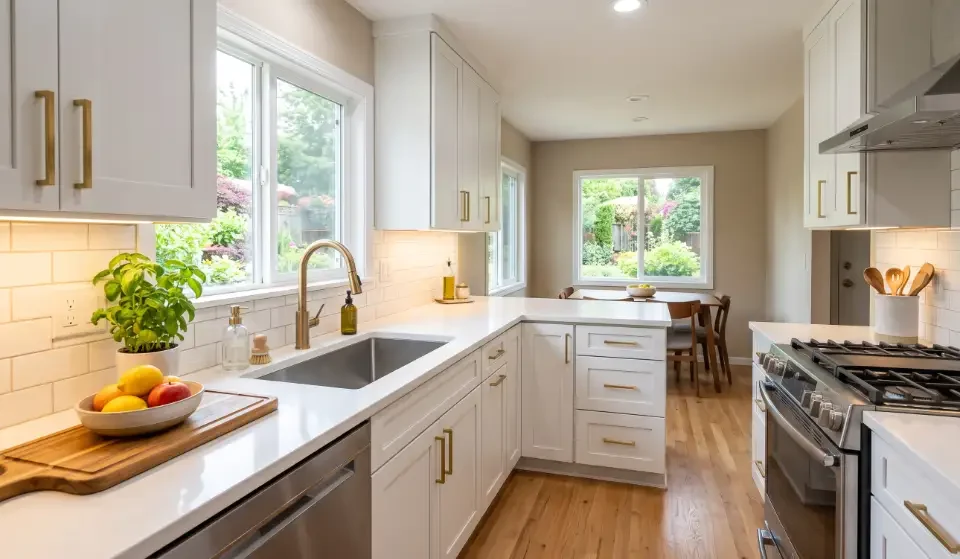

Your kitchen may look dated, feel cluttered, or make cooking harder than it should. Kitchen upgrading tips Mintpaldecor can help you make smarter changes without starting a renovation. The key is to focus on improvements that solve problems while making the room feel fresh and welcoming. In this guide, you’ll discover ways to improve kitchen upgrades, choose cabinet hardware, brighten dark work areas with better kitchen lighting, create smarter storage solutions, and refresh the room with a backsplash. You’ll also learn which upgrades deserve your budget, which mistakes to avoid, and how to plan each change in the right order. That way, your kitchen can work better without unnecessary spending.
1. Find the Kitchen Problem That’s Actually Costing You
Before buying paint or new hardware, look at how you use the room every day. Good kitchen upgrade ideas start with a problem rather than a product. Maybe you constantly move appliances to create counter space. Perhaps the sink feels cramped or one corner stays dark. Write down the three frustrations you notice most often.
Then rank those problems by frequency and impact. A dated cabinet color may bother you once a week. Poor task lighting can annoy you every time you prepare dinner. That difference matters. One of the smartest kitchen upgrades is fixing the problem you experience repeatedly before spending money on purely decorative changes.
| Problem you notice | Upgrade to consider | Priority |
| Dark work surface | Under-cabinet lighting | High |
| Crowded drawers | Drawer organization | High |
| Dated cabinet color | Cabinet refinishing | Medium |
| Worn hardware | New pulls or knobs | Medium |
| Empty wall | Decorative feature | Low |
A common beginner mistake is copying a kitchen photo without asking whether the feature suits their own space. Instead, spend one week noticing what slows you down. That simple habit can prevent you from buying something attractive that doesn’t solve anything.
2. Refresh Cabinets Before You Replace Them

If your cabinet boxes remain sturdy and the layout works, replacement may not make sense. Painted cabinets can dramatically change a kitchen without removing the entire system. Refinishing works especially well when the doors have a dated color but no major structural damage. However, damaged hinges, swollen particleboard, or failing cabinet boxes can justify a larger project.
Preparation makes the difference. Clean away grease first, repair dents, lightly sand suitable surfaces, then use the right primer and finish. Don’t rush the curing time. A homeowner who skips preparation may see peeling within months. For many budget kitchen upgrades, careful cabinet preparation delivers more visible change than expensive accessories.
| Cabinet condition | More suitable approach |
| Solid boxes and dated finish | Refinish or paint |
| Good boxes with damaged doors | Replace doors |
| Minor scratches or wear | Repair and touch up |
| Swollen or failing structure | Consider replacement |
| Poor layout | Evaluate the whole kitchen |
When should you replace instead of refresh? Use replacement when the cabinet structure, storage capacity, or layout creates the actual problem. Otherwise, keep what works and improve what doesn’t.
3. Swap Cabinet Hardware for a Fast Visual Upgrade
Small hardware changes can alter the character of an entire kitchen. Cabinet hardware, especially longer pulls, can make older doors look cleaner and more current. Knobs can suit traditional kitchens while pulls often work well on larger drawers. The finish should also relate to other visible metals instead of competing with them.
Before ordering anything, remove one existing handle and measure the distance between its screw centers. That measurement prevents a surprisingly common mistake: purchasing attractive pulls that don’t fit the existing holes. New drilling can work, but it creates extra repair work. This is one of the easiest DIY kitchen upgrades when you measure first and shop second.
Pro tip: Keep one old handle with you when shopping. It gives you an instant reference for hole spacing, size, and screw length.
You don’t need every metal in the room to match perfectly. However, two or three coordinated finishes usually look more intentional than a collection of unrelated ones.
4. Layer Your Kitchen Lighting Instead of Adding One Bright Fixture

A single ceiling fixture often leaves work areas shadowy. Better kitchen lighting combines general illumination with task lighting where you actually chop, wash, and cook. Under-cabinet fixtures can place light directly onto the counter instead of forcing your body to block the ceiling light.
LEDs also offer practical advantages for frequently used areas. The U.S. Department of Energy notes that efficient lighting can significantly reduce household lighting energy use, while kitchen under-cabinet LEDs can provide targeted illumination over work surfaces. U.S. Department of Energy lighting guidance
The common mistake is installing lights without considering where the beam lands. Put the fixture too far back and the wall may glow while the counter remains dim. For electrical changes that involve new wiring, use a qualified professional rather than guessing.
5. Turn Dead Storage Into Space You Actually Use

A kitchen can have plenty of cabinets and still feel short on storage. The issue often comes from unusable corners, deep shelves, or poorly organized drawers. Kitchen organization can turn that wasted volume into accessible space without adding another cabinet.
HomeEvery home improvement ideas
Measure the inside of each cabinet before buying an organizer. Width, depth, door clearance, and shelf height all matter. Pull-out shelves can help with deep cabinets, while vertical dividers work well for trays and cutting boards. These storage solutions become especially useful when you cook often and need quick access to heavy or awkward items.
| Wasted space | Useful improvement |
| Deep lower cabinet | Pull-out shelf |
| Narrow vertical gap | Tray divider |
| Crowded drawer | Adjustable organizer |
| Cabinet door | Door-mounted rack |
| Corner cabinet | Corner pull-out system |
Don’t buy organizers simply because they look clever. A $30 organizer that wastes half the cabinet is still wasted money. Measure first and choose the system around what you actually store.
6. Upgrade the Sink and Faucet Around Your Cooking Habits
Your sink handles more work than many decorative features in the kitchen. If you wash large pans regularly, a deeper basin may help. If you frequently rinse vegetables and fill tall pots, a flexible pull-down faucet can make those jobs easier. A large sink isn’t automatically better because it can also consume valuable counter space.
Think about your cooking habits before choosing a new fixture. Someone who rarely cooks may prefer easier cleaning and more counter area. A frequent cook may value bowl depth, spray reach, and faucet movement more. This is where kitchen sink upgrades should follow function rather than trends.
A beginner mistake is choosing a faucet based only on appearance. Check the mounting holes, sink configuration, cabinet clearance, and faucet reach first. Otherwise, your beautiful new fixture may create an annoying installation problem.
7. Give the Backsplash a Bigger Impact Without Overbuilding It
A backsplash can connect cabinets, counters, and walls into one visual story. Kitchen backsplash materials range from ceramic tile to stone, glass, and easier peel-and-stick products. The right choice depends on heat exposure, moisture, cleaning needs, budget, and installation skill.
For example, peel-and-stick material may suit a temporary cosmetic refresh. Traditional tile can make more sense when you want a long-term finish and have the skills or budget for installation. Don’t choose only from a photograph. Backsplash design needs to work with your countertop pattern and cabinet color.
| Situation | Consider |
| Quick cosmetic update | Peel-and-stick option |
| Long-term renovation | Ceramic or porcelain tile |
| Busy cooking area | Easy-clean surface |
| Strong countertop pattern | Simpler backsplash |
| Plain kitchen | More decorative backsplash |
A frequent mistake is adding too many patterns. If the countertop already has strong movement, a quieter backsplash can create balance.
8. Make Your Countertops Work Harder Before Replacing Them
Countertops often look older because surrounding elements have become tired. Before replacing them, inspect the actual surface. Countertop upgrades can include deep cleaning, repairing small damage, changing the edge appearance, or improving the lighting around the surface.
For example, a dull counter under poor lighting can look much worse than it does in daylight. New counter space may also come from removing rarely used appliances rather than installing a new surface. Ask whether the material is genuinely failing or simply looks dated. That distinction can save a large amount of money.
Measure carefully and consider appliance clearances before ordering. A new countertop should solve a problem rather than create one somewhere else.
9. Improve Kitchen Flow Before Buying an Island

An island can add prep space and storage, but it can also make a small kitchen uncomfortable. Before buying one, mark its proposed footprint on the floor with painter’s tape. Walk between the island, refrigerator, sink, range, and dishwasher as you normally would.
This simple test reveals problems that a showroom cannot. Kitchen layout decisions should account for appliance doors, walking paths, and the places where people naturally stand. Good kitchen workflow keeps common tasks from crossing each other unnecessarily.
| Before buying an island | Check |
| Refrigerator | Door opening |
| Dishwasher | Door clearance |
| Range | Cooking access |
| Main walkway | Comfortable movement |
| Prep zone | Enough usable counter |
The common mistake is buying an island because it looks luxurious in photographs. If the room becomes difficult to navigate, the feature has worked against you. Sometimes a narrow cart or movable prep table gives you more flexibility.
10. Upgrade Appliances Based on How You Cook
New appliances can be useful, but appearance alone shouldn’t determine the purchase. Start with the appliance you use most and identify what currently frustrates you. A frequent cook may value refrigerator storage, dishwasher capacity, or a more capable range. Someone who rarely cooks may have different priorities.
Check measurements before ordering. Kitchen appliances need more than cabinet width. Door movement, ventilation, electrical requirements, water connections, and delivery access can all matter. ENERGY STAR also recommends considering efficient appliances when replacing household equipment.
Don’t assume the newest appliance automatically improves your kitchen. If the existing refrigerator works well and consumes reasonable energy, spending that money on lighting, storage, or another daily problem may make more sense.
11. Add One High-Impact Detail That Makes the Kitchen Feel Finished
Once functional problems are handled, add one feature that gives the room personality. A pendant above an island, distinctive faucet, open shelf, artwork, or decorative hood can become a visual anchor. Modern kitchen design often feels polished because one feature leads the eye instead of everything competing for attention.
This is where restraint helps. If you already have patterned tile and bold cabinets, a dramatic pendant may create visual noise. Instead, choose something quieter. The goal isn’t to fill every empty surface. Good kitchen decor leaves enough breathing room for the important features to stand out.
A common beginner mistake is decorating around clutter. Clear unused items first, finish functional upgrades, then style the remaining space. The final result usually feels cleaner without requiring more purchases.
How to Spend $100, $500, or $1,000 on Kitchen Upgrades
Your budget should determine the sequence, not the other way around. With around $100, focus on small changes that affect frequently used areas. With $500, combine several functional improvements. A larger budget gives you room to tackle a more visible project without immediately entering full-remodel territory.
These amounts are examples rather than fixed renovation prices. Material quality, kitchen size, location, and labor can change the final cost considerably.
| Budget | Possible focus | Main goal |
| $100 | Hardware and small organizers | Quick visual and storage improvement |
| $500 | Lighting, hardware, storage, paint | Balanced refresh |
| $1,000 | Cabinet refresh and targeted upgrades | Larger visible transformation |
The smartest approach is to spend first where you experience the biggest problem. That keeps your budget tied to usefulness instead of impulse purchases.
The Best Order for Your Kitchen Upgrade Project
The order matters because some upgrades affect others. Start by identifying problems and measuring the space. Then set your budget before purchasing materials. After that, handle functional improvements such as storage, lighting, and hardware before finishing with decorative details.
For most homeowners, this sequence reduces unnecessary rework: problem identification → measurements → budget → function → surfaces → lighting → hardware → styling. You can adjust it when a project requires a specific installation order. However, planning first will usually prevent expensive surprises.
A useful shortcut is to photograph every wall, cabinet, appliance, and counter before shopping. Measurements tell you what fits. Photos help you remember what the existing finishes actually look like.
Kitchen Upgrade Mistakes That Cost More Than They Should
The most expensive mistakes usually happen before installation begins. Buying without measurements, choosing products before checking compatibility, and copying a layout from a larger kitchen can all create problems. Another common issue is focusing on appearance while ignoring storage, circulation, lighting, or maintenance.
Electrical and plumbing work deserves extra care. A cosmetic project can often suit a capable DIY homeowner. New wiring, major plumbing changes, structural work, or gas-related modifications may require professional help and local permits. Don’t turn a simple refresh into a safety problem.
| Mistake | Better approach |
| Buying before measuring | Measure first |
| Choosing style over function | Identify the daily problem |
| Adding an oversized island | Test the footprint |
| Ignoring lighting position | Light the work surface |
| Replacing usable cabinets | Consider refinishing |
| Doing complex electrical work alone | Use a qualified professional |
The goal isn’t to make your kitchen look expensive. It is to make the space work better while giving it a style you enjoy seeing every day.
FAQs About Kitchen Upgrading Tips Mintpaldecor
What is the easiest kitchen upgrade to make?
Changing cabinet hardware is one of the simplest visual updates because it needs little time and can change the room’s overall character. Measure existing holes before ordering new pieces.
How can I upgrade my kitchen without remodeling it?
Start with lighting, storage, cabinet finishes, hardware, and small fixture changes. These projects can improve appearance and function without changing the entire kitchen layout.
What kitchen upgrades add the most visual impact?
Cabinet finishes, lighting, hardware, and a well-chosen backsplash can create noticeable changes. The best choice depends on what currently makes your kitchen look or feel dated.
Should I paint or replace my kitchen cabinets?
Paint or refinish solid cabinets when their structure and layout still work. Replacement makes more sense when the boxes are damaged or the existing design creates major storage problems.
What should I upgrade first in an old kitchen?
Start with the problem you experience most often. Fix poor lighting, limited storage, awkward workflow, or damaged surfaces before spending money on decorative features.
Final Thoughts
The best kitchen upgrading tips Mintpaldecor aren’t about buying the most expensive products. They’re about making deliberate changes that solve real problems. Start with the way you use the kitchen, then work through measurements, storage, lighting, surfaces, hardware, and styling.
Before you start shopping, walk through your kitchen and write down the three things that annoy you most. Pick the one that affects you every day. Then set a realistic budget and make that your first upgrade. Once the practical work is done, add one design feature that makes the room feel like yours.


